Langmeier Backup
This is how it works: Online backup with Langmeier Backup
In various articles on our blog, we repeatedly draw your attention to how important it is to have a data backup after backing up off-site. But if you do this with a hard disk, you always have to remember to take it back to the store or home and re-record it. Or you have several hard disks or other backup media such as tapes in use.
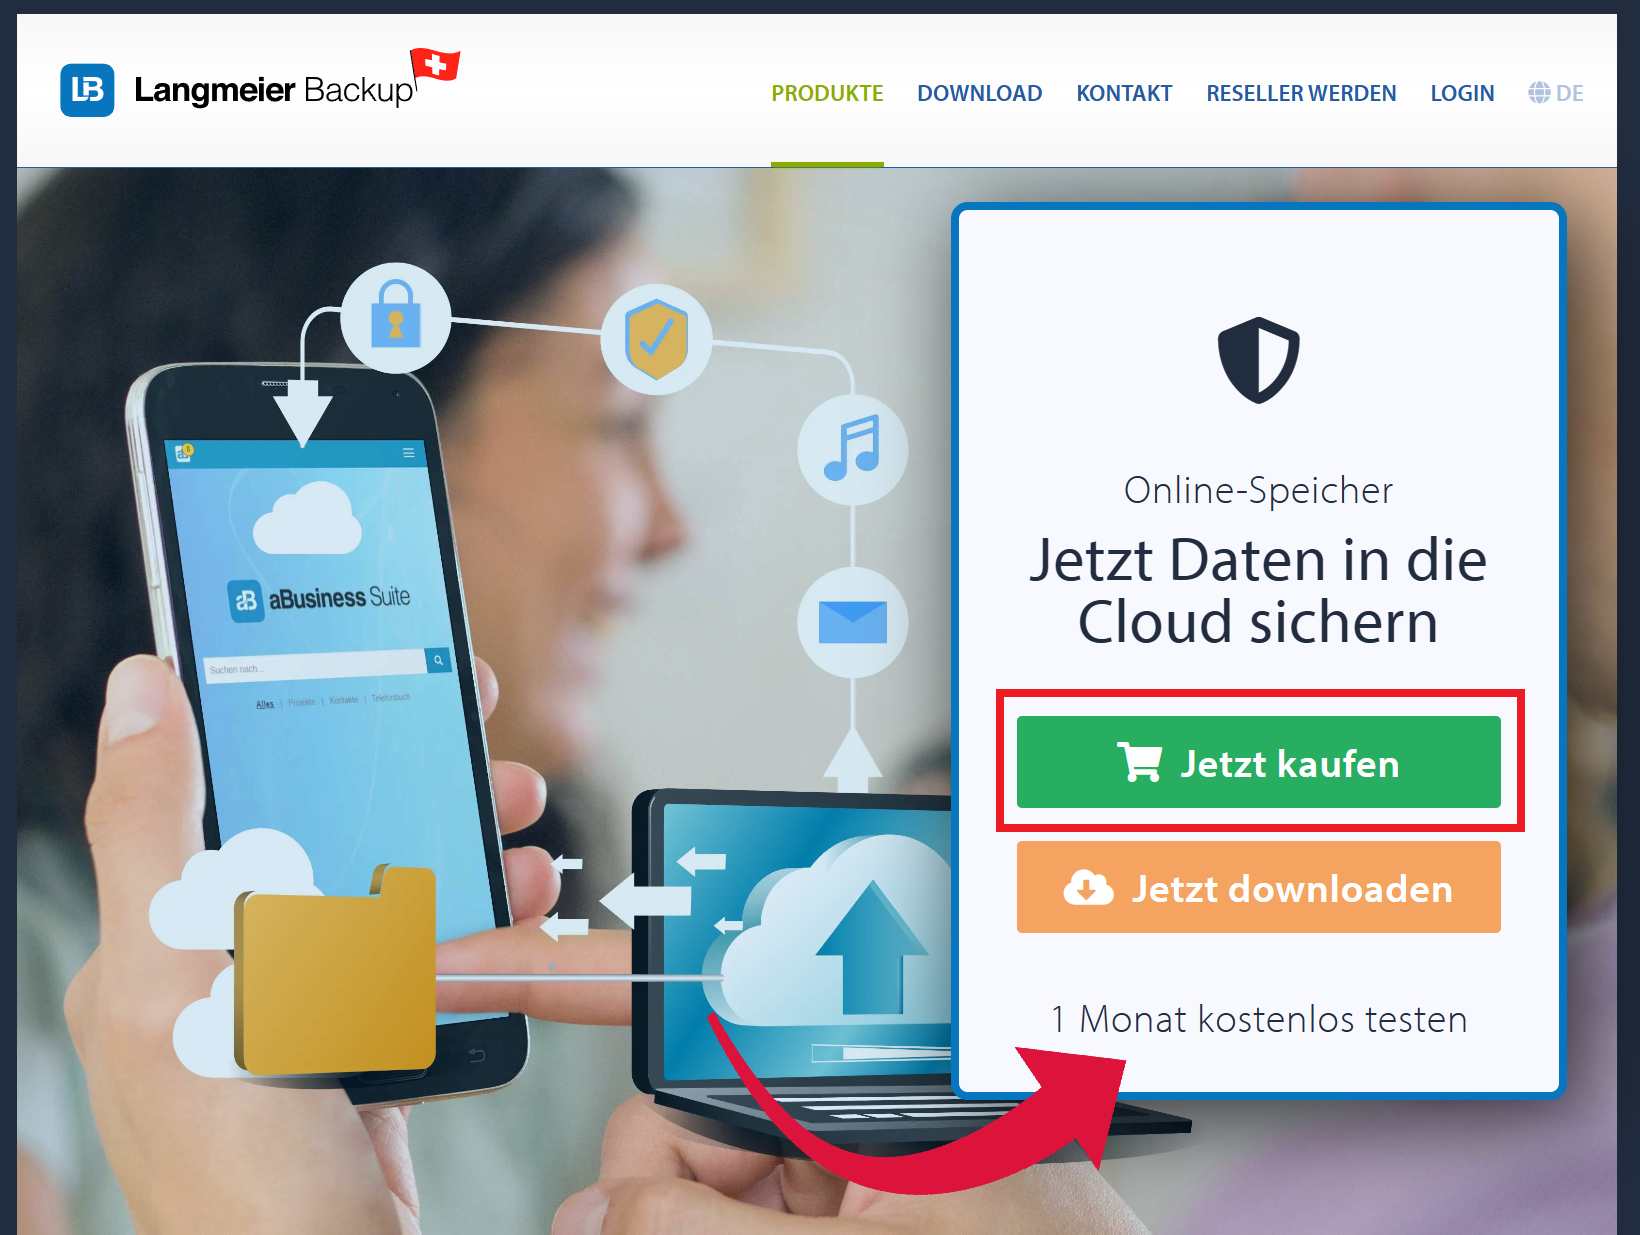
It would be much easier to make an online backup and back up your data to the cloud. After uploading the backup, the data is safe off-site on the cloud storage. With aBusiness Suite, Langmeier Software offers its own data storage in the cloud, which is specially optimized for backup and archiving.
Cloud backup is designed to be simple. You set it up once. It then runs - provided, of course, that you set it up accordingly. We recommend that you set up the online backup automatically.
Here we explain step by step, including screenshots, how to set up your personal online data backup or cloud backup with Langmeier Backup.
Jump directly to setting up the online data backup.
Preparation before you can switch your data backup to online
Update to the latest free version
Langmeier Software always releases free updates between the main paid releases. Carry out this update, otherwise the online data backup may not work.
Click on "Help" and then on Update:
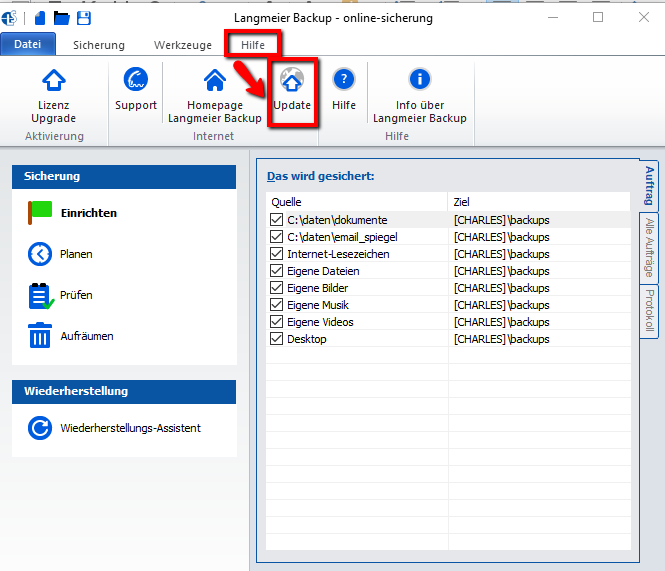
You will now be taken to a special update page from Langmeier Software. If a suggestion for an update appears there, follow the instructions and install the update.
If the message "Your program version is up to date" appears, you can start setting up the online data backup directly.
Jump directly to setting up the online data backup.
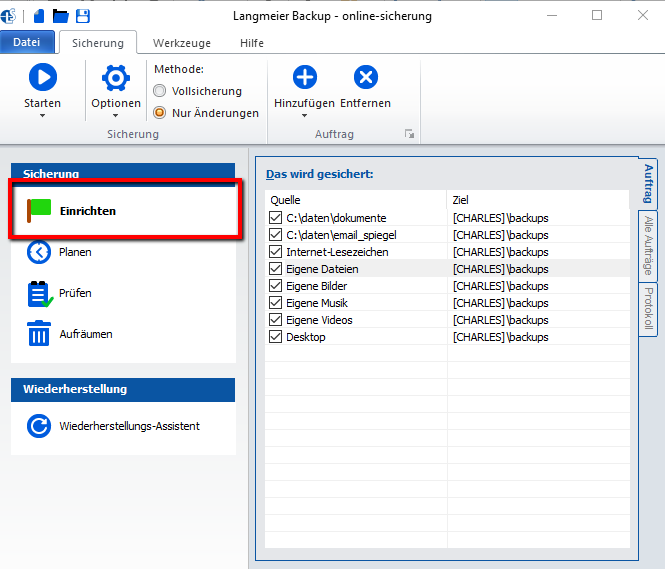
Set up online backup with Langmeier Backup
Click on "Set up":
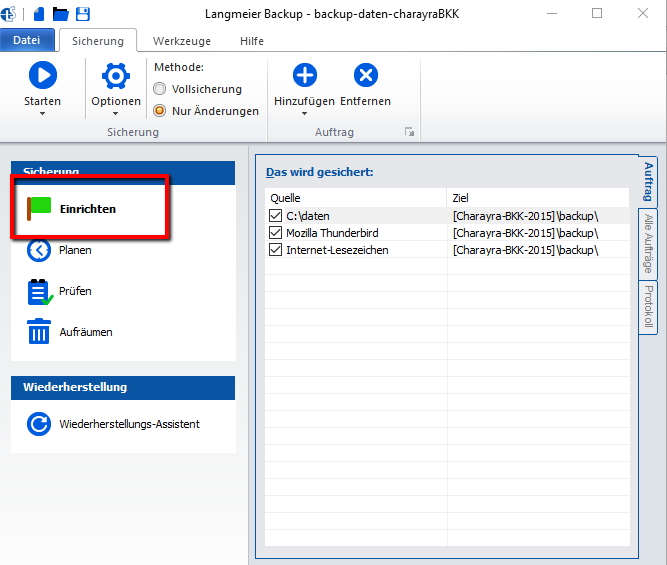
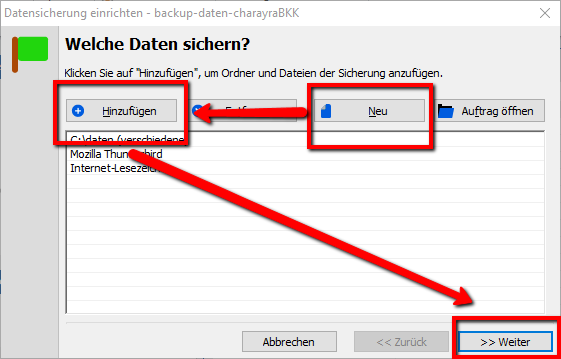
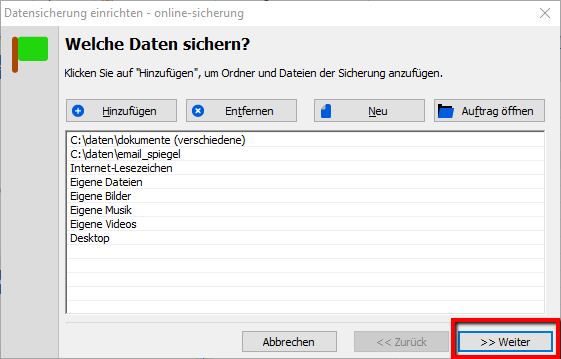
In the window that opens, click on "New" - if it is to be a new data backup job - and then on "Add". You now have the choice between the following options:
- Folders and files
- E-mail and Internet bookmarks
- Documents, media data and desktop
- All images
- Disk image
You can also add several options one below the other, e.g. you may want to back up the most important data on your computer as well as emails and Internet bookmarks. Then simply click on "Add" twice and set up both before continuing.
Tip: If you click on "Documents, media data and desktop", all standard Windows folders will be added to the backup. A practical thing!
Now click on "Next" at the bottom right.
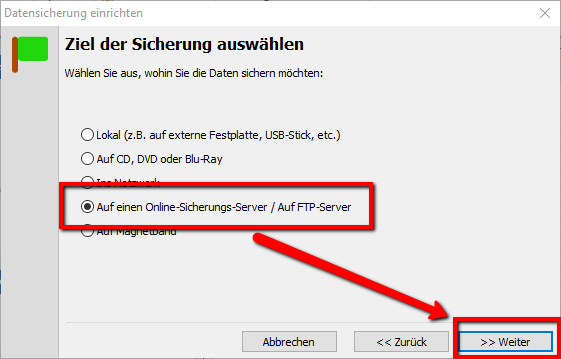
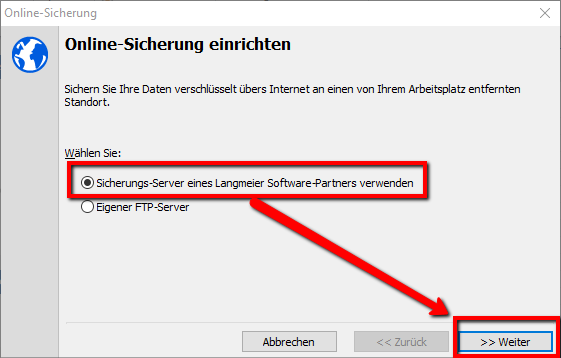
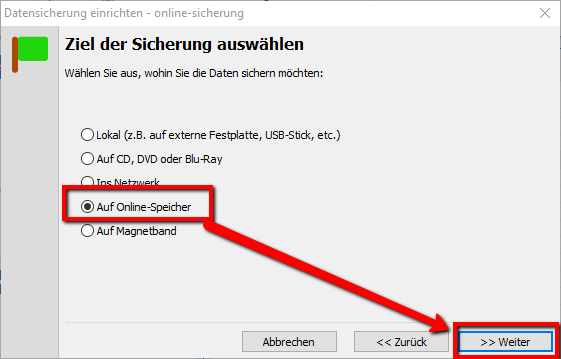
In the next window, click on "To an online backup server / To FTP server", then on "Next":
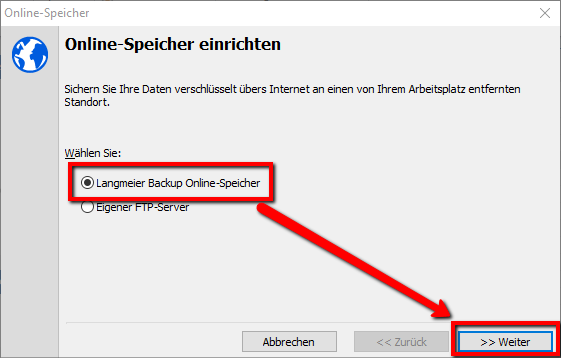
Click on "Use backup server of a Langmeier software partner", then again on "Next":

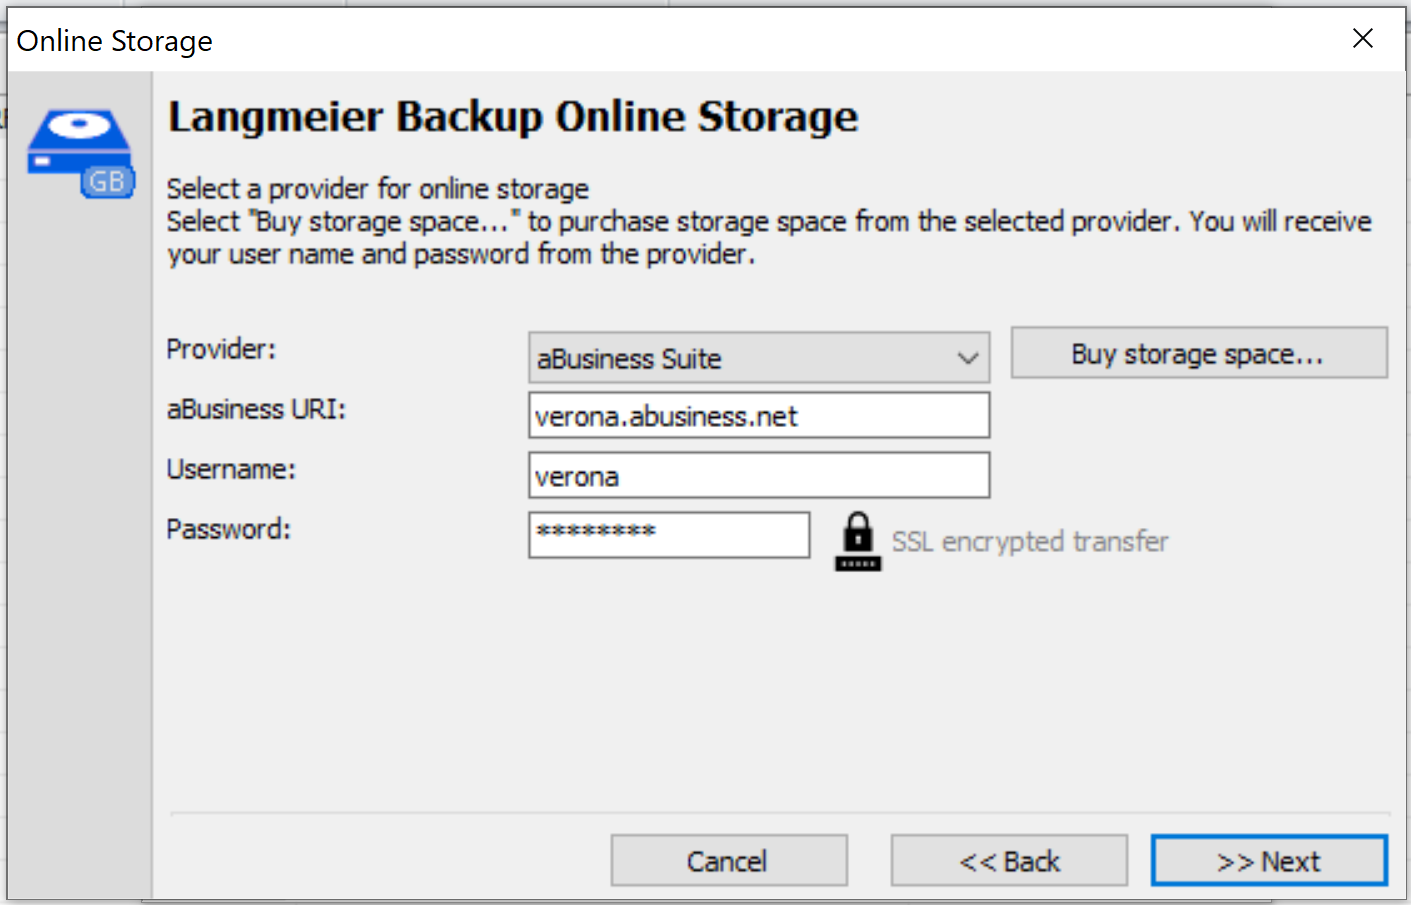
Select "aBusiness Suite" or another data storage partner of Langmeier Backup - and then click on "Create new account". In our example, we use Langmeier Software's own aBusiness Suite as backup storage.
Click on "Buy now":
Now go to the checkout and pay for the purchased amount of Internet storage. Once the order has been successfully completed, a window will appear with the message "We have received your order." Within 24 hours you should now receive the details for the online storage you need for Langmeier Backup.
Remember to save your newly created or modified order so that you can find it again when you continue.
Setting up online data backup with Langmeier Backup - continued
Open the correct backup task and then click on "Options", "Online backup":
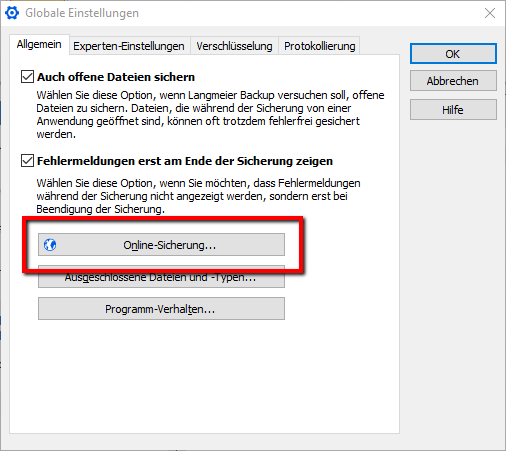
Now you are back in the menu item "Set up online backup".
Click on "Use backup server of a Langmeier software partner", then again on "Next":
As "Backup server", select the company or provider with which you have created the online storage account. In the case of this tutorial, it is "aBusiness Suite".
Now enter the data you received from the partner company under "User name" and "Password".
We recommend that you save your data in encrypted form. To do this, you must set a password and enter it in the "Password for encryption" field. To do this, click on "Change password" and enter your password twice.
Make sure that you still know your encryption password months and years from now if you ever need to restore a file in an emergency, as you will not be able to open it without a password.
When everything is completed, the window will look like this. Now click on "Next":
Now click on "Ok" to close the global settings.
Langmeier Backup is now connected to the provider of your choice, in this example aBusiness Suite.
Now you need to change the backup destination of your task to "online". To do this, click on "Set up":
Click on "Next":
In the "Select backup destination" window, select "To online storage" and then click "Next":
In the next window, select "Langmeier Backup Online Storage" and click "Next":
In the next window, which you had already filled out completely before, check the details again and then click on "Next".
In the next window "Give the backup a name" also check the details again and then click on "Next".
Click on "Finish" in the "The backup is set up" window.
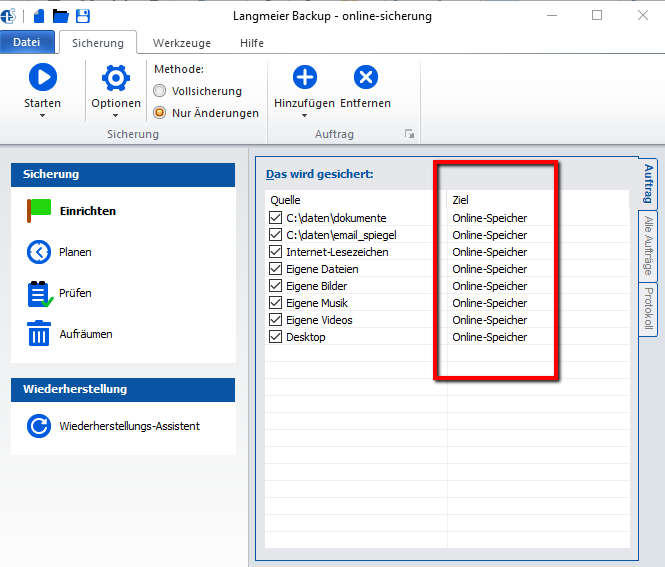
If "Online storage" appears everywhere as the destination in the main window that now appears, you have done everything correctly:
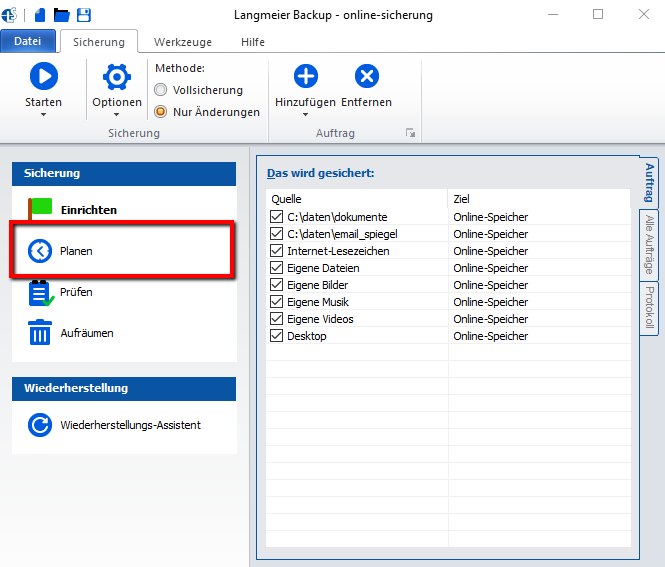
In the case of the online backup, it makes sense to set up a scheduled data backup. In the case of this example, we start the online backup automatically as soon as the computer starts. To see all the options available to you, go to the Langmeier backup help.
Automate online backup
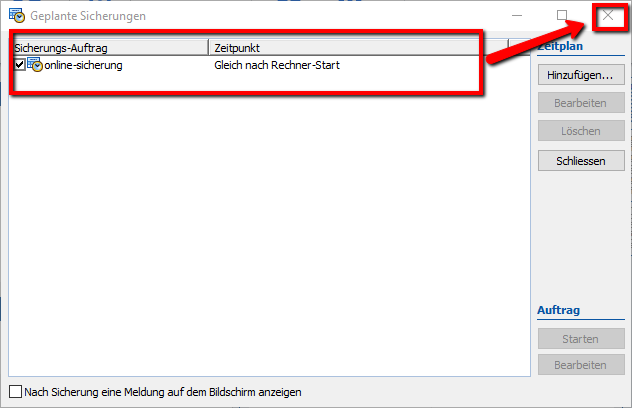
You want to start the backup automatically so that you no longer have to worry about it. To do this, click on "Schedule":
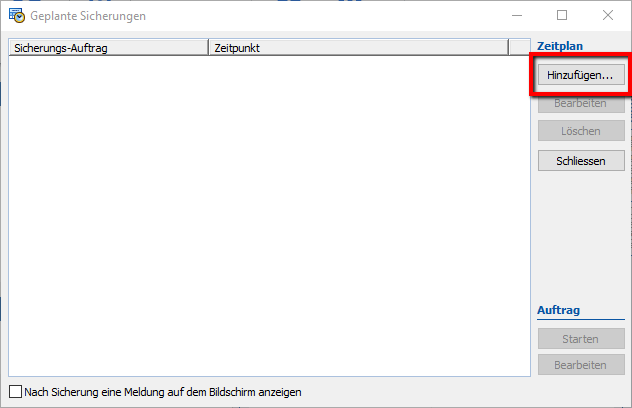
In the new window that opens, click on Add:
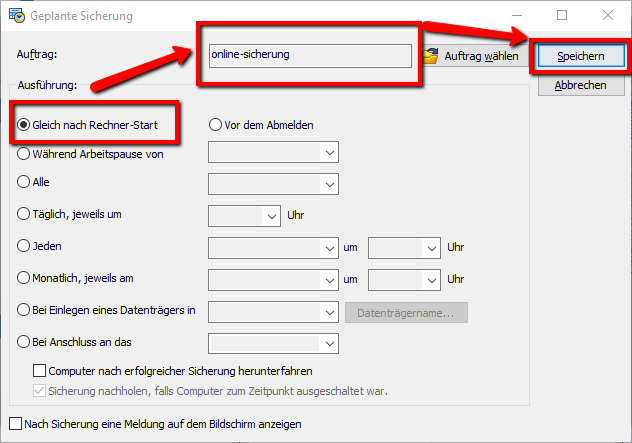
Select "Immediately after computer startup", check that your task name - in the case of this example, "online backup" - is under Task and click Save:
Your scheduled backup will now appear in the window. At the same time, there is now a Langmeier Backup icon at the bottom right of the Windows menu, as the task was started immediately and Langmeier Backup is now active in the background.
Close the window:
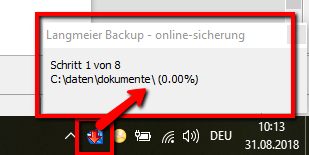
If you look at the icons at the bottom right, you will notice that Langmeier Backup is still working on your backup in the background.
Congratulations! You have now completely set up your online backup, including planning.
Checking the status of the online backup
Click once on the Langmeier Backup icon at the bottom right with the left mouse button. A small box will appear informing you of the backup status:
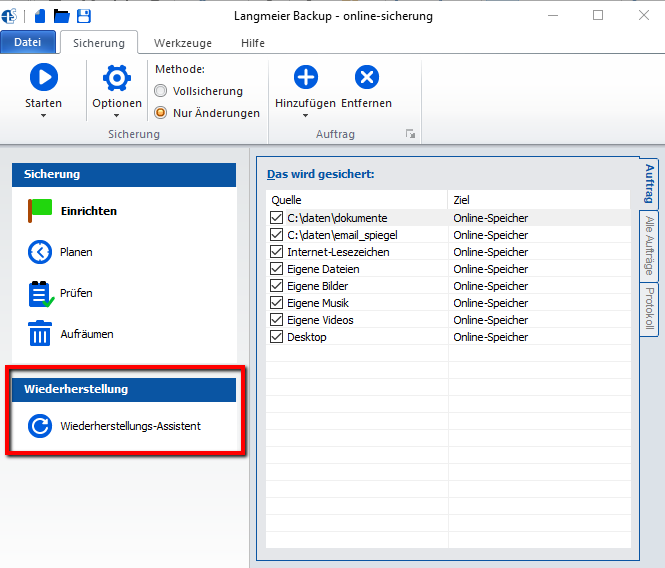
Restore data from the online backup
If an emergency occurs or you want to test whether the backup worked, you can restore the files. In a test case, you can also restore them to another folder to check whether everything worked. Please note that the online data backup takes a long time in the first case, as all files have to be uploaded first. Once all files have been uploaded, Langmeier Backup will update or synchronize the data according to your settings.
Click on Restore Wizard:
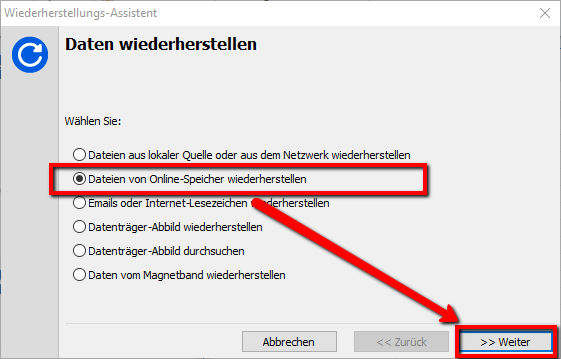
Select "Restore files from online storage" and click "Next":
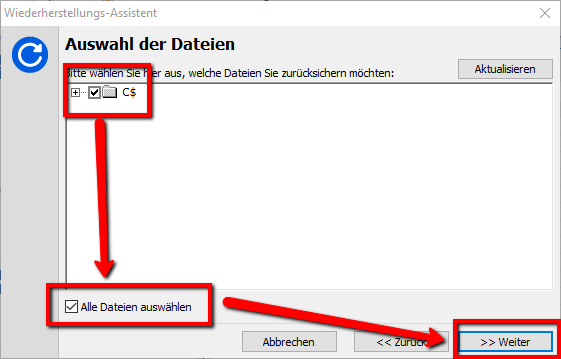
Select all the files you want to restore or simply select "Select all files". Then click on "Next":
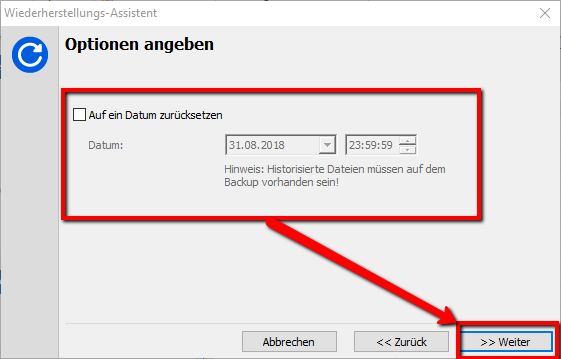
In the next window, you can still select if you want the data to be restored to an earlier point in time. This requires that you have selected the historicized data backup for the task. Click on "Next":
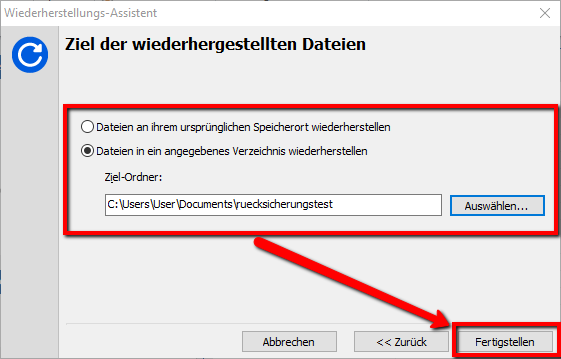
Now select the "Destination of the restored files":
If it is an emergency, select "Restore files to their original location".
If it is a restore test, select "Restore files to a specified directory".
Then click on "Finish":
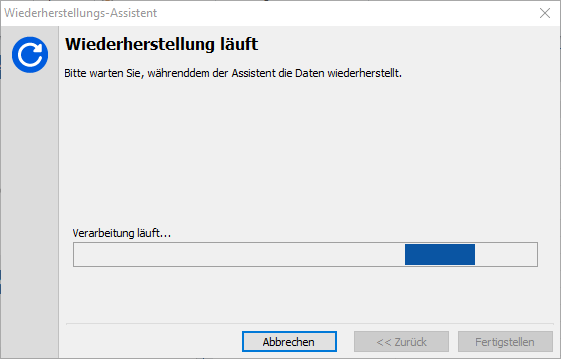
The following window will appear:
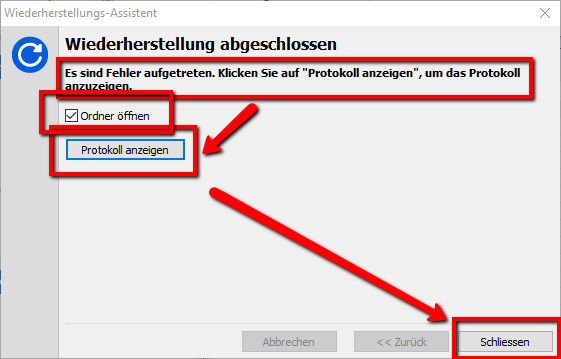
At the end, the following window appears. In the case of the example here, error messages appeared because we had not waited until the online data backup had been completed for the first time:
 Brochure